De Peel Raamstelling
In the aftermath of the first World War the Dutch government made plans to defend its territory more succesfully. One of the results was a long line of bunkers starting from Grave all the way South towards the Belgian border near Weert. North of Grave was a natural obstruction for any advancing enemy troops: the river Maas. The long line of bunkers were build in 1939, infantry regiments supported by artillery batteries were stationed to hold this line. All bunkers were in fire/ visible range of one another along the line.
The German high command knew of this defensive line and made plans accordingly. The small town of Mill was going to be the scene of one of the fiercest battles imaginable during the opening hours of the 10th of May invasion German troops.
Although the Battle for Mill is one of the lesser known events, its story should be given much more credit. For the complete stories (in Dutch) I would like to redirect to the following two websites:

(For the complete battle report)

(For more indepth information about the Battle for Mill)

(For specific photographs after the battle)
A summary of the Battle for Mill:
The German high command knew about the long line of bunkers. All over this line Infantry Divisions, artillery and anti-tank guns would advance and start the attack against Dutch troops. It was obvious that this would be a long enduring battle - unless the Germans managed to attack the bunkers from the rear. Since outflanking was no option a different plan had to be made.
Using German commando's in Dutch military police uniforms to occupy a railway bridge near Gennep, over the river Maas, the Germans managed to inflitrate an armored train (Panzerzug) with wagons holding an entire Infantry Battalion! This train would pass the bridge, pass Mill and towards the town of Zeeland it would disembark the troops. These troops would double back towards Mill and surrounding arrea's to attack the bunkers from the rear.
Now the Dutch infantry in Mill knew that a Panzerzug had passed their town, to stop it from returning back to embark more German troops, they barricaded the railway with large steel bars. The Panzerzug returned and it derailed. Crews manning the Panzerzug engaged in combat with the Dutch troops.
The German battalion made contact with the bunkers North of Mill. The Dutch artillery battery which was defending that area used its guns as direct fire and a fierce battle ensued. All over the bunkerline North and South of Mill, as well as in Mill itself, battles between German and Dutch troops raged. The Dutch high command directed a fast moving Infantry Motorcycle unit towards Mill, where it reoccupied some bunkers which were conquered by the Germans. Bunkers were attacked by German anti tank guns, artillery or aircraft. German troops managed to pass the Maas in small numbers, including artillery. Dutch bunker crews fought until their ammunition was spend and small groups kept on fighting around their piece of bunkerline. Eventually 2.000 Dutch troops were battling a German force which grew to about 30.000 men.
At around 18:00 a German flight of 37 Ju88 bombers engaged the Mill area for 45 minutes. This would be the final strike which resulted in all Dutch troops defeated or retreating.


Above the German Panzerzug derailed in Mill. To the left the large overview of German attacks - with the Panzerzug infiltration visible. To the right a map of the local Battle for Mill near the derailed Panzerzug.


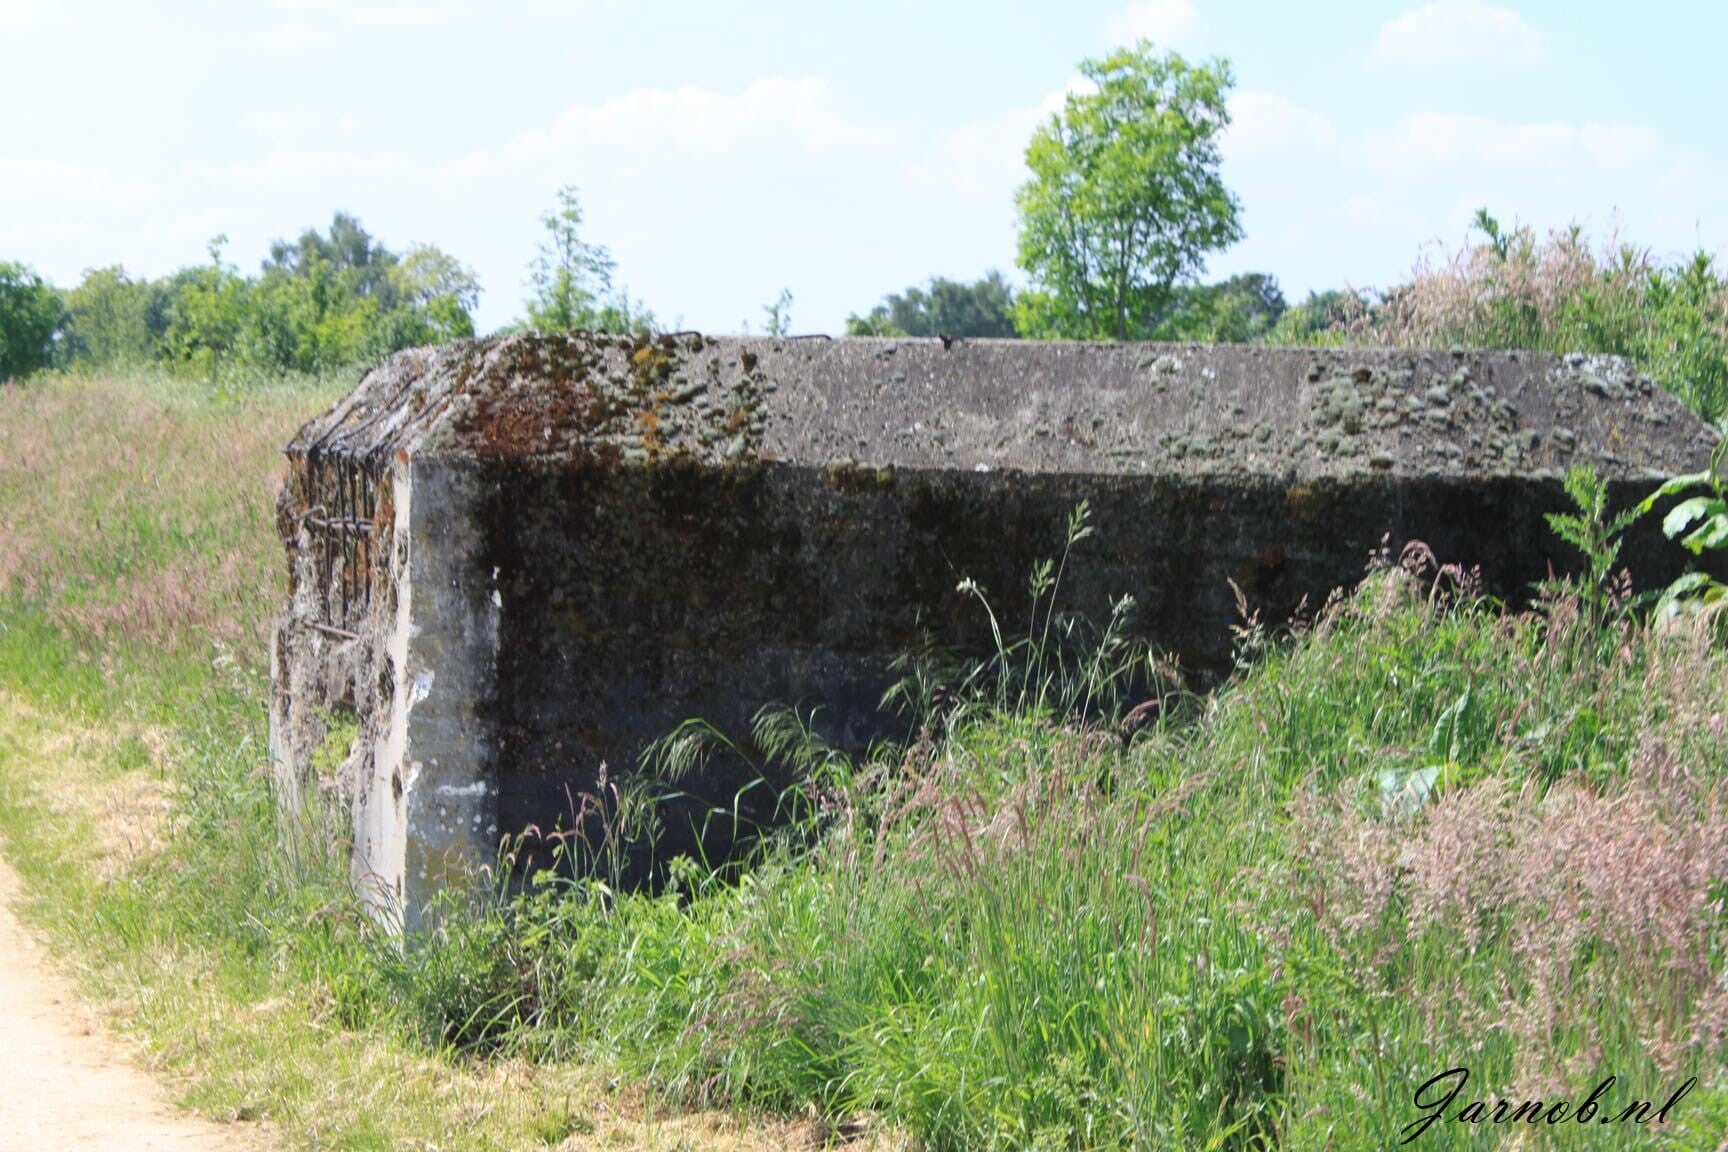
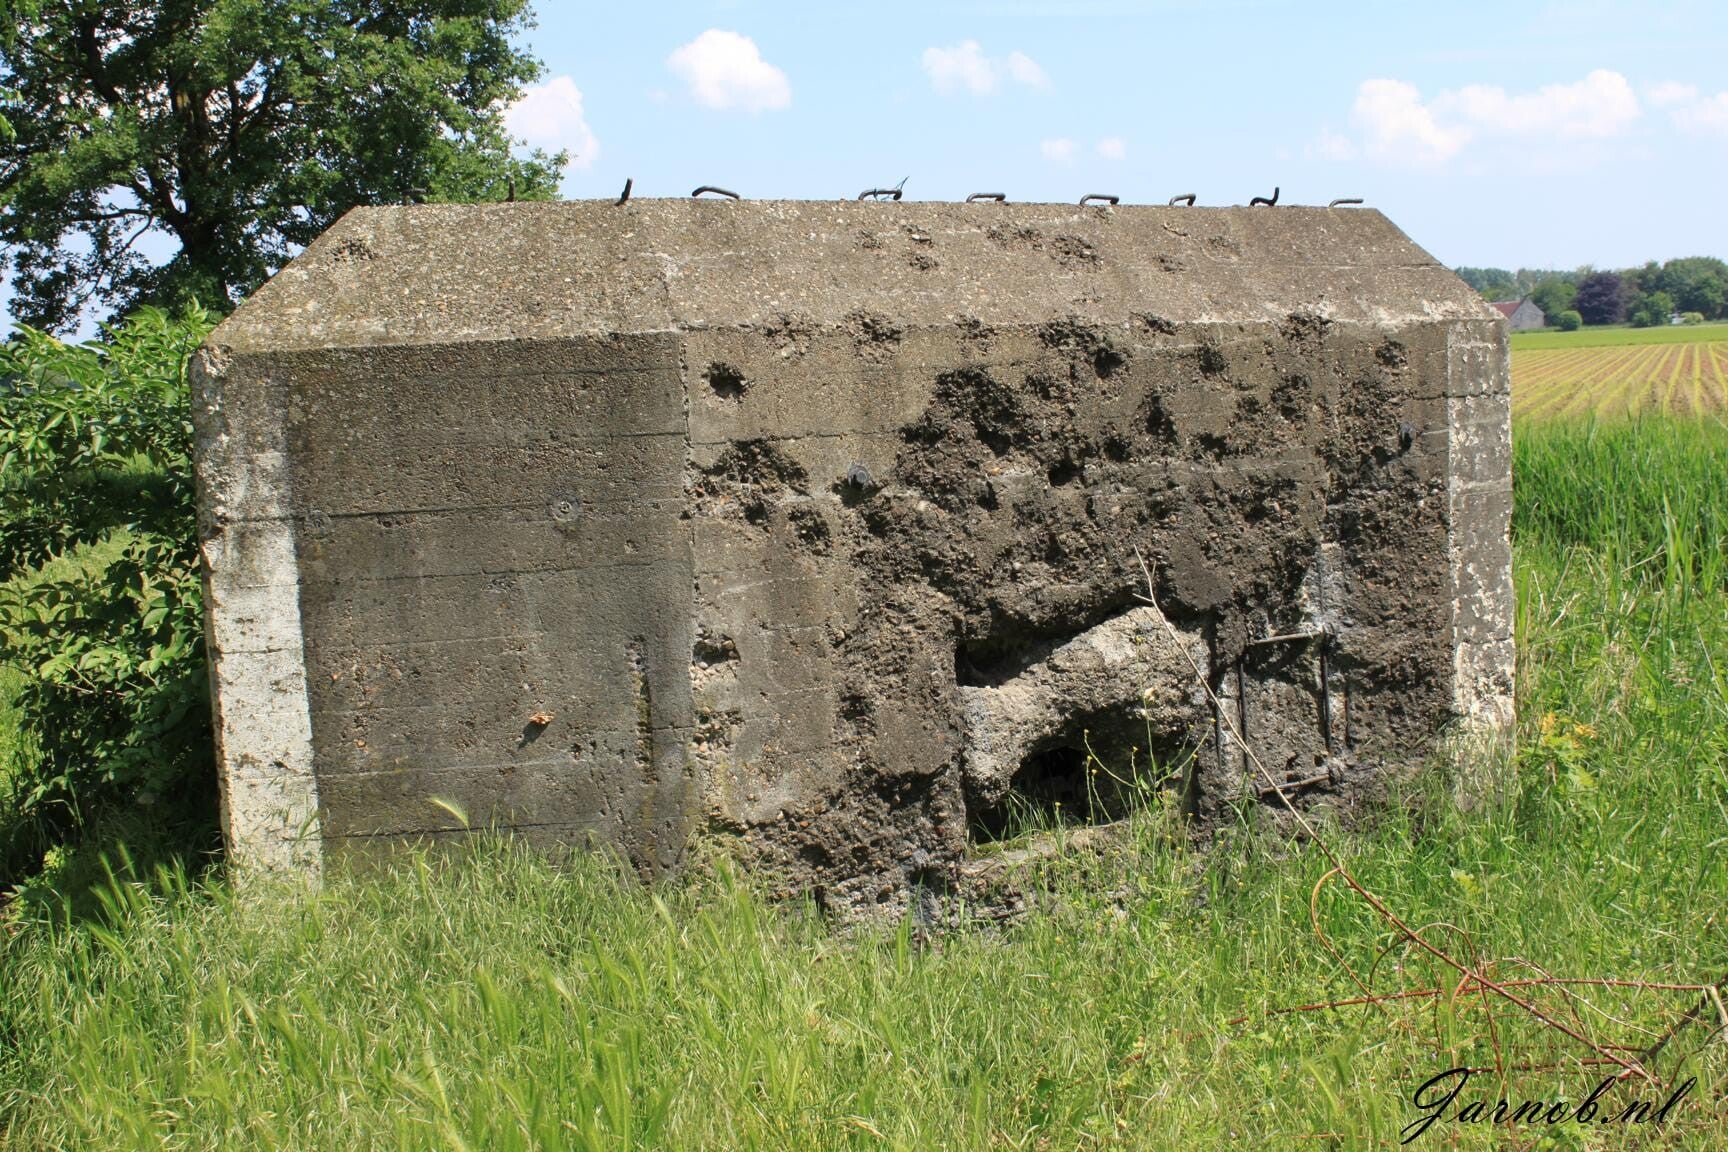
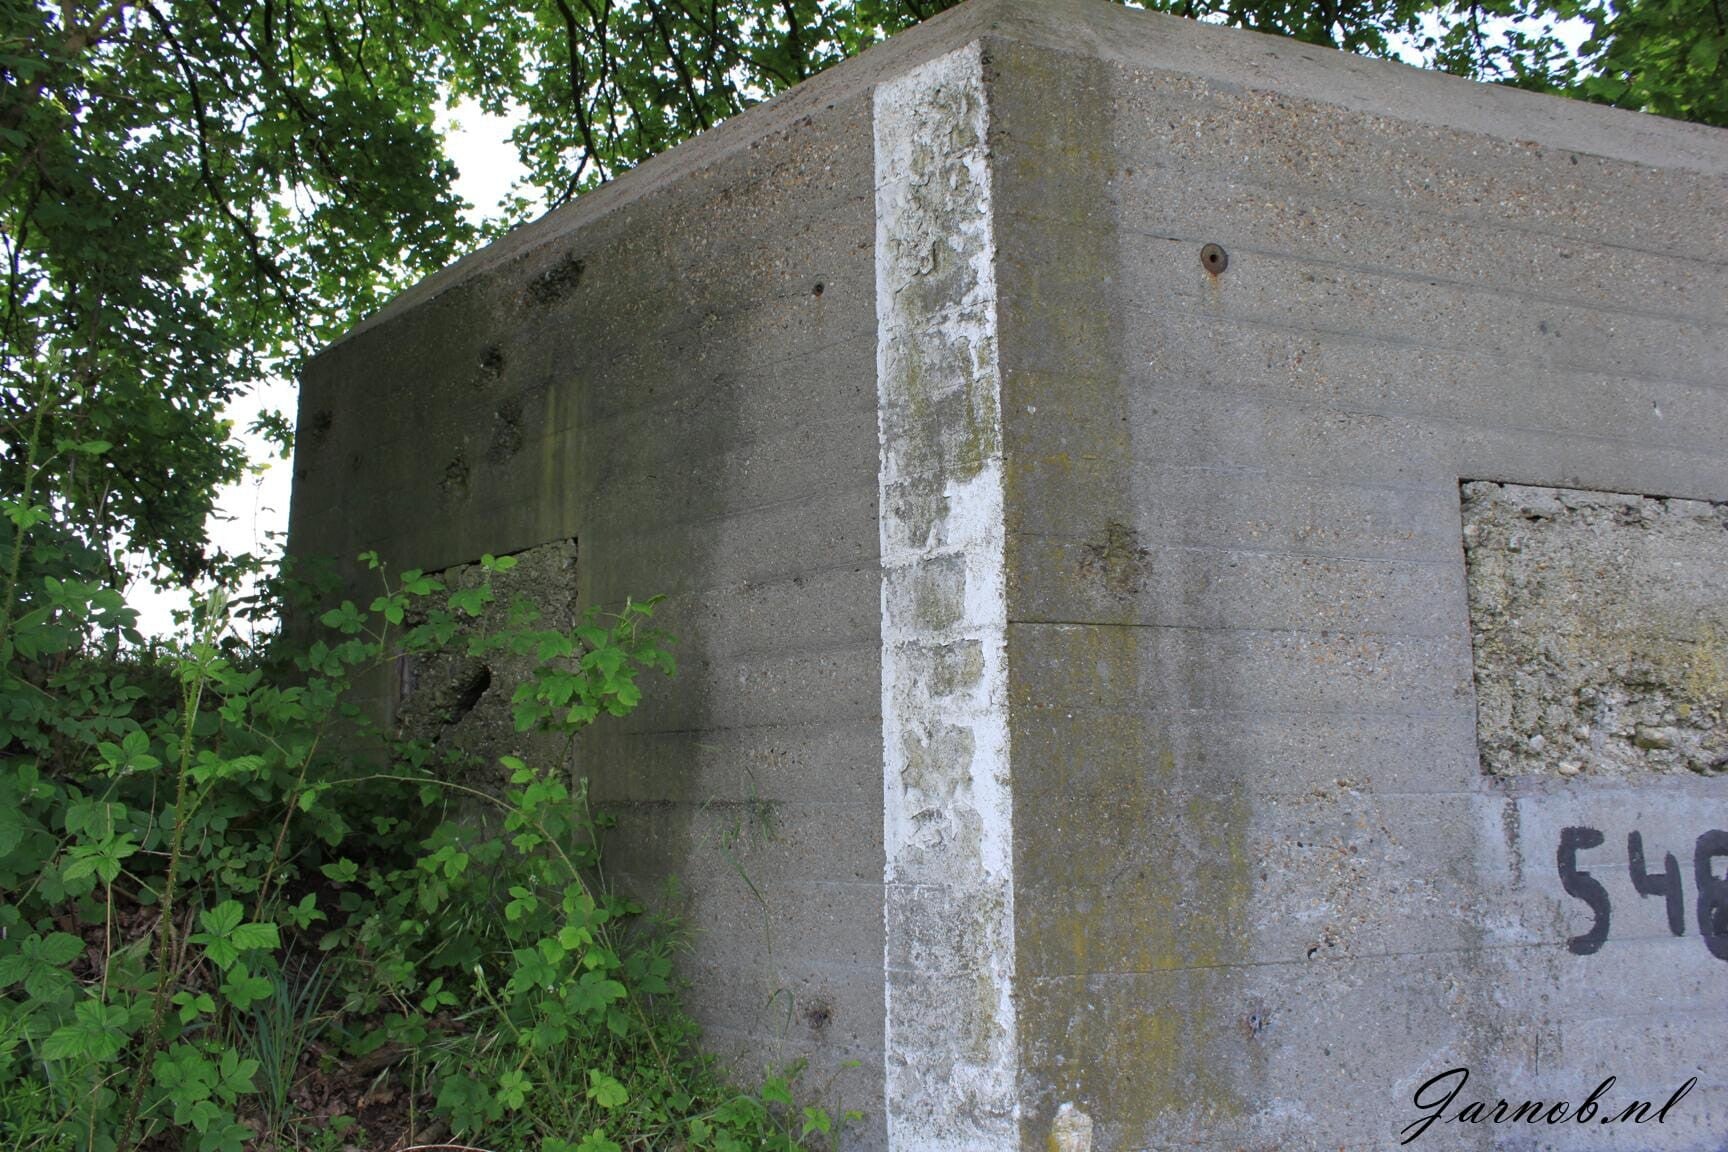
Since my home town is Grave I made a long historical trip along all bunkers from Grave to the Southern area of Mill, photographing each bunker. Traces of combat are still visible on many of these bunkers. The first row of bunkers seen from Grave:


The bunkers around Mill and inside of Mill near the baricaded railway. Some trenches between bunkers are reproduced. And part of the steel railway baricades are still present. There is also a small memorial for the defending Dutch troops: the 3rd and 6th Regiment Infantry.